
If you haven’t heard of Microsoft Teams yet, where have you been for the past six years? Teams is a powerful collaboration platform that allows your humans to easily communicate and work together one-on-one or in groups. And one of its key features that allows for effective collaboration is that it lets your team members share documents, images, and other files with each other in real-time, and work on them simultaneously.
But while the platform makes it easy to share and work on documents together, managing the permissions for those files in Microsoft Teams can be complicated, especially if you’re a larger business with multiple teams and channels.
In this article, we will explore the benefits of sharing files on Microsoft Teams, why Microsoft Teams file sharing permissions are complex, how they work in tandem with Microsoft SharePoint, and the steps to effectively share files and manage permissions in Microsoft Teams.
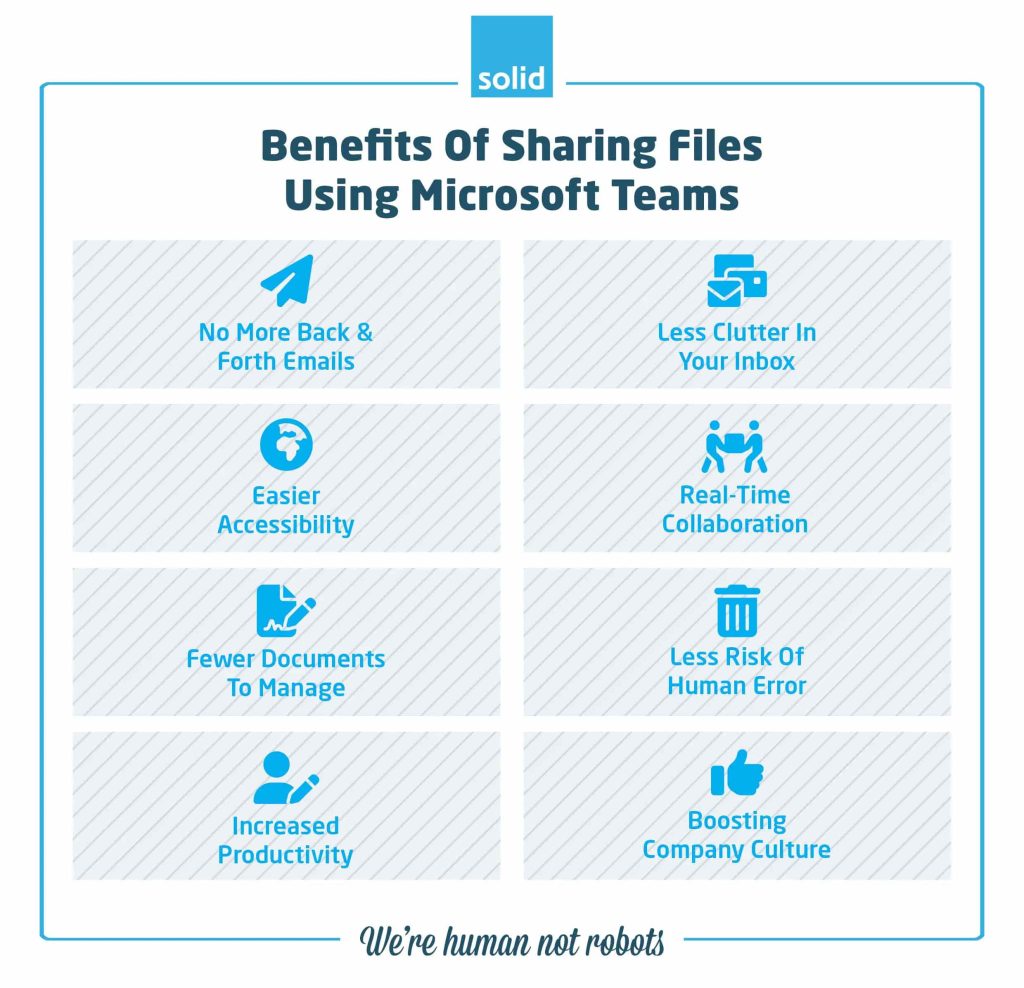
Benefits of Sharing Files Using Microsoft Teams
File sharing on Microsoft Teams offers numerous advantages for teams looking to streamline their workflow.
1. No More Back And Forth Emails
While email does have its uses, it’s certainly not the most effective method of communicating, especially within a business. There’s too much potential for critical information to get lost in the deluge of incoming mails and back-and-forth. Sharing files directly on Microsoft Teams eliminates the need for endless email chains, since you can talk to your team members directly, either one-on-one or in a group, and get immediate responses.
2. Less Clutter In Your Inbox
One of the biggest problems with email communication is the abundance of emails that we’re getting on a daily basis. And how many of them are legitimate and important? If you’re anything like me, then most of the emails I get are either advertising, spam or phishing attempts. But collaborating on files through Teams helps to keep your inbox neat and tidy. Instead of countless attachments cluttering your email and getting lost in the deluge, files are neatly organised within the Teams platform, making them easier to locate and manage.
3. Easy Accessibility
Files shared on Microsoft Teams are conveniently accessible from anywhere, at any time. This means team members can work remotely, collaborate on-the-go, and ensure project timelines are met no matter where they are in the world, no matter where their team mates may be based, and no matter which device they may be using.
4. Real-Time Collaboration
Real-time collaboration in Microsoft Teams allows multiple individuals to work on the same document at the same time. This fosters a dynamic work environment where ideas can be shared instantly, discussions can be given immediate context, and changes can be seen in real time, enhancing team work and seeing your humans working together towards common goals.
5. Fewer Documents To Manage
Because Microsoft Teams lets you store all of your shared documents in a single, accessible platform, it reduces the number of documents that you need to manage. Every team member doesn’t need to have their own copy of the files they’re working on – they can access them directly from Teams and work on them together. This makes file management, and version management in particular, far easier, since there’s no need to store multiple versions of a document when you can all work on it together, see revisions that have been made to it quickly and easily, and even revert the changes that have been made all with the click of a button.
6. Less Human Error
Because you’re able to make changes to documents in real time, and the people you’re working with can see the changes that you’re making instantly, there is less risk of information becoming duplicated, older documents being worked on instead of their latest versions, and information becoming compromised because of human error. Plus, it’s less likely that two people are going to be working on the same task, since each of them can see what the other is busy with.
7. Increased Productivity
A lot of the benefits that I’ve already mentioned come together to increase your teams’ overall productivity. With fewer email chains to sift through, immediate access to files no matter where you may be in the world, the potential for real-time collaboration and improved document management, Microsoft Teams makes it easy for the humans in your business to work efficiently and effectively, with minimal disruptions taking up their time. And the seamless workflow that Teams allows for makes it easier for your team members to do more with the time that they do have.
8. Boosting Company Culture
Microsoft Teams also plays an instrumental role in enhancing company culture. It provides a platform for seamless communication, fostering stronger relationships, team cohesion, and a more inclusive workplace environment. This ultimately leads to higher employee satisfaction and engagement.
Why Microsoft Teams File Sharing Permissions Are Complicated
While the benefits of sharing files on Teams are numerous, managing Microsoft Teams file sharing permissions can be complicated. With multiple users and various levels of access to documents, ensuring that everyone has the right level of permission can be a challenge.
• Integration with SharePoint
One factor that contributes to the complexity of Microsoft Teams file sharing permissions is its integration with SharePoint. SharePoint allows for granular control over permission levels for individual files and folders. This means that file permissions can be managed at both the team and individual level, making it necessary to understand how SharePoint’s permission hierarchy works.
• Confusion between Teams and SharePoint Permissions
Another issue that adds to the complexity is the confusion between Teams and SharePoint permissions. While they are linked, each platform has its own unique permission settings and levels. This can cause confusion for users who may not be familiar with SharePoint’s permission structure.
How Do File Permissions Work in Microsoft Teams and SharePoint?
To effectively manage Microsoft Teams file sharing permissions, it is essential to understand how files are stored in both Microsoft Teams and SharePoint. In Teams, files are stored in a shared document library within the corresponding team site on SharePoint. This means that the permission settings for a file in Teams are ultimately controlled by the SharePoint site’s permission settings.
Steps That You Can Take To Share Files On Microsoft Teams
Whether you’re working on Microsoft Teams on your desktop, laptop, tablet or phone, it’s quick and easy to upload files and update file permissions and make sure that the people you’re sharing files with are able to work on them effectively.
• Desktop
To upload a file for sharing in Microsoft Teams:
- Navigate to the conversation, group chat or team channel that you want to share it in.
- Drag and drop the file that you want to share into the box where you’d usually type a message.
- If you’re in a channel or group chat, dragging and dropping won’t always be possible – in this case, click on the ‘Attach’ button underneath the message box and find the file that you want to share.
- Wait for it to upload.
- Click send or press enter.
If you’re wanting to change the permissions for a file that you’ve already shared in Microsoft Teams to allow a new team member to access, view or edit the document, follow these steps:
- Navigate to the channel that the file was shared in – if you’re in a one-on-one chat or group conversation, everyone in the chat will already have the access that they need to view the file.
- Select the ‘Files’ tab within the channel.
- Click on the ellipsis (…) next to the file name.
- Select “Manage access”.
- This will open up a window where you can add or remove users and adjust their permission levels.
- To add a new user, click on the ‘Grant Access’ option – the user image with a plus alongside it.
- Type in the name of the person that you want to share the file with, and click on the pen alongside their name to select what type of permission you would like them to have – either ‘Can edit’ or ‘Can view’.
• IOS
If you’re using an Apple device, uploading a file for sharing in Microsoft Teams is just as easy as it is using a desktop or laptop:
- Navigate to the conversation, group chat or team channel that you want to share it in.
- Click on the ‘Attach’ button underneath the message box, and find the file that you want to share.
- Wait for it to upload.
- Click send or press enter.
Changing Microsoft Teams file sharing permissions is just as easy on an Apple iPhone or iPad as it is using the desktop app.
- Navigate to the chat, group conversation or channel that the file is stored in.
- For a one-on-one chat, click the information button on the top right of your screen.
- For a group conversation, select the ‘Apps’ tab and click on the ‘Files’ option.
- For a channel, click on the ‘Files’ tab.
- Tap the three vertical dots next to the file that you want to share – make sure it’s a file, not a folder.
- Select ‘Share’ from the available options.
- Find the person, group or channel that you want to share the file with.
- The file will come up within the message box, allowing you to type a message, but also allowing you to change the access and permissions for the file itself.
• Android
The process for uploading files using an Android phone or tablet is very similar to Apple devices:
- Navigate to the conversation, group chat or team channel that you want to share it in.
- Click on the + button to the left of the message box.
- Select ‘Attach’ and find the file that you want to share.
- Wait for it to upload.
- Click send or press enter.
Managing file sharing permissions on the Android version of Microsoft Teams is also very similar to the steps you’d take on an IOS device.
- Navigate to the chat, group conversation or channel that the file is stored in.
- For a one-on-one chat, click the information button on the top right of your screen.
- For a group conversation, select the ‘Apps’ tab and click on the ‘Files’ option.
- For a channel, click on the ‘Files’ tab.
- Tap the three vertical dots next to the file that you want to share – make sure it’s a file, not a folder.
- Select ‘Share’ from the available options.
- Find the person, group or channel that you want to share the file with.
- The file will come up within the message box, allowing you to type a message, but also allowing you to change the access and permissions for the file itself.
A Better Way Of Sharing Files Through Microsoft SharePoint
While Microsoft offers a user-friendly interface for managing Microsoft Teams file sharing permissions, it can become complicated when working with multiple users and groups. In such cases, it can be easier and more effective to share a link to a document that is stored in Microsoft SharePoint rather than uploading a copy of the file into a conversation, group chat or channel.
SharePoint allows you to create folders and set specific permission levels for each folder. This means that you have more control over who can access which files within a shared folder. You can also easily grant or revoke permission for specific individuals or groups, without having to go through the process of uploading a new version of the file each time.
Plus, by using SharePoint you can also track changes made to files and maintain a centralised version control system for easier collaboration within teams. This eliminates the risk of different team members working on outdated versions of a document and ensures that everyone is always working with the most recent version.
How To See All The Files You've Shared Across Teams Chats
If you’re an active user of Microsoft Teams, it’s likely that you have shared numerous files across various channels and conversations. Keeping track of all these shared files can become overwhelming, especially when trying to find a specific document that was shared weeks ago.
Fortunately, Teams has a built-in feature that allows you to see all the files you have shared across chats and channels. By clicking on the “Files” tab located on the left-hand side of the app, you can easily access a list of all the files you have recently shared. This makes it easier to find and re-share important documents without having to search through old conversations.
How Can Solid Systems Help?
At Solid Systems, we understand the importance of effective collaboration within your business, and how it can help to increase productivity and boost company culture. And more than that, we understand the ways that Microsoft 365 tools can be put to better use for your business to achieve that better productivity, increased efficiency, and enhanced culture.
As a Microsoft hyper-focused technology partner, we can help you navigate the complexities of using tools like Microsoft Teams, SharePoint, OneDrive and more effectively, and provide training for the humans within your business to help them leverage Microsoft technologies and do more with their time.
If you’re a business with 20 or more users and are wanting to do more with the Microsoft tools that are already at your fingertips, schedule a free consult with our Sales team today. Let’s see you building a company culture that is centred around technology and maximising its advantages to see your humans connecting to each other, and to their work, in more meaningful ways.